Sunday, 17 November 2019

25 Hacks of Christmas 2019


During 2018 I compiled the blog '25 Minecraft hacks of Christmas'. As we approach Christmas 2019 here is my follow up '25 Hacks' of Christmas 2019'.   

1st:   Lego link
2nd: Minecraft link
3rd: Lego link
4th: Minecraft link 
5th: Lego link
6th: Minecraft link
7th: Lego link
8th: Minecraft link

9th:  Lego link
10th: Minecraft link

11th: Lego link 
12th: Minecraft link
13th: Lego link 
14th: Minecraft link

15th: Lego link 
16th: Minecraft link
17th: Lego link 
18th: Minecraft link
19th: Lego link 
20th: Minecraft link

21st: Lego link 
22nd: Minecraft link
23rd: Lego link 
24th: Minecraft link


25th: Brand new Minecraft blog.................

Friday, 15 November 2019

Microbit Express 3.5(Controlling multiple trains)


A few weeks ago The Micro:bit Express got an upgrade with a new motor controller from 4tronix Read more here(link). Two weeks down the line I bought another one as I was so impressed with it. Now I have updated the code for the remote control to use the pins to allow independently remote control two separate Lego Trains. You can see a brief but shaky demo of this working below:


Again I have used MakeCode editor link

Below are the hex files for the two trains and the remote control.

Train 2 code link
Train 1 code link 
Remote controller link

You will need:

  •  Three Micro:bits
  • Two Lego Trains 
  • Two 4tronix motor controllers 
  • 2 6 volt battery packs to power the motor controller and the Micro:bits.

Basic info added(more detail to come)

Cya 

Chris


Thursday, 24 October 2019

Microbit Express 3.0


Over the last year I have been gradually tweaking away at iterations of controlling Lego Trains with code. Here is the most recent attempt from the summer link.

Recently the Kitronic motor controller that I had broke / wore out. I needed a replacement, I initially tried a cheap motor controller from China, which worked but I struggled with dealing with the connections of wires / not being able to get a consistent response from the motors. This is more an indication of my lack of finesse with this sort of thing than the motor controller being inappropriate Les wrote a blog especially as ever the man is a saint(link).

Then two weeks ago I saw Les Pounder was testing a new smaller, cheaper motor controller from 4tronix. So I read up on it here (4tronix blog for about Drivebit link ) and then bought one  (You can buy the Drivebit here). Delivery charge was cheap and it came the next day, which was a bonus.

Here is what Micro:bit Express 3.0 currently looks like:


Here it is in action:
I used Microsoft Makecode, and eventually settled on the code below, which uses the 4tronix extension which can be added on the extensions section. It isn't apparently there but if you type in the following URL in the extensions search bar it will appear: https://github.com/4tronix/DriveBit

Also I found 4tronix super responsive to customer questions through email.

You can download the code here

Here is what the code looks like(please note the motors should be directed fwd and back but I will edit at some point):


Thursday, 22 August 2019

Microbit with Minecraft adventures


I will be creating a series of new resources over the next 6-8 months focused on learning CS using the Micro:bit in combination with Minecraft. The plan is to build up from the basics into more advanced topics. 

Challenge one: "Variable hunter"

Challenge two: "Selection blocks" 

Challenge three: "Steve-Nav"

Challenge four: "What an array of blocks"

Challenge five: "Going loopy while loops"

Challenge six: "Going loopy for loops"  

Challenge seven: "2D arrays pixel art"


I'm sure this will change completely but that's all part of the fun :)


Monday, 1 July 2019

Thanks the dish best served........


The aim of this blog is to give a small token of thanks to Alan O'Donohoe. I could write a heck of a lot about how helpful he has been over the past few years to me. From the podcast link, to the Raspberry Jams, the empowerment through pertinent and timely advice. He is a legend but here is what other people had to say .............


"In 2013 Alan introduced me to the Python community in the UK via PyCon UK. This started my career writing Python code for projects in publications across the world. Alan's tenacity and enthusiasm are infectious and are a continuous source of drive for us all."

Rachel Lancaster

"I love everything about Alan. From his flamboyant shirts, to his infectious character. If I ever need advice then I know that I can simply ask Alan. I think I first met Alan whilst working at CPC maybe 5 years ago, but since then, I’ve attended many events alongside him, and we run Raspberry Jams together. Alan never fails to amaze me. He really knows his stuff and he leaves a lasting impression wherever he goes. Alan. I salute you."


 "Alan is a good friend and a very inspirational character. I first met Alan at Preston Raspberry Jam back in September 2015 and he was amazed by a small project that I had made. He then enthusiastically created a YouTube video about it. Since then Alan has supported me with planning talks and sessions, as well as helping me with my GCSE examinations."


"Alan has helped me by providing opportunities to meet others interested in computing in schools e.g. the monthly science museum get together. His friendliness has always made me feel included


"Well, Alan started me off in the tech space so I have a lot to thank him for. If it wasn't for the Jams and the people who he connected me with, nothing that I have done in the past 6 years would have happened and it's the same story for a lot of people. Our community all comes back to Alan starting a small jam in Preston, ultimately."


Josh Lowe's dad Dave

"Joshua’s mum and I own Alan so much. When josh was 8 years old he was really starting to get into tech and coding and we had no idea what to do to help him. Lara started to look on line to see what groups there were out there. She came across the Preston Raspberry Jam and we took Josh along to see what it was all about. At the jam we met Alan and told him all about Josh and the problems that we were facing. That night changed our families lives forever. Alan put us in contact with people like Les Pounder, Chris Dell and Jason Meares. These people have helped to shape and nurture Josh into the young man he is today. Through Preston Raspberry Jam Josh has acquired the skills to do talks and presentations and of course it was the birth place of EduBlocks. We will be forever indebted to Alan and can not thank him enough for all that he has done for Josh."


"Alan was always a friendly, knowledgeable and inspiring supporter on Twitter, sharing computing resources, tips and teaching techniques. I have had the pleasure over the years to work with him. He has an ability to develop while still empowering you. He truly is an enabler, bringing out the best in others. Alan is kind, funny, smart and has made a real difference to Computing at both the educational level and the human level. His can also pull off the coolest shirts."


"I can't recall the first time I met Alan, I think we had chatted online many times before actually meeting up... Alan has always been really supportive of me through Exabytes and I remember meeting with him at BETT one year where he sat me down with a coffee and gave me some the best advice I have ever had about running the Hull Raspberry Jam (I am still working on implementing what he told me!)..."


"6 years ago I went to Manchester to the first Jamboree and met this larger than life character. Without really being asked I ended up volunteering at the event. Alan showed me the true value of community and how so much can be achieved with the enthusiasm and backing of like minded people. I have run numerous events since (not all Raspberry Pi or technology) and the lessons I learnt from Alan in Manchester still ring true today."


"Full ideas and sage words of wisdom. Helped me think though a lot of ideas and given me great advice. He has infectious enthusiasm. "


"He is THE loveliest of people. I was just saying how highly esteemed he is in my eyes :-) Well. If ever anyone in education was worthy of receiving an MBE then its Alan."


I think thanks is a dish best served communally.


Cya :)


Exabytes 2019: Micro:bits and Minecraft


During #Exabytes19 I ran a session on using Micro:bits with Minecraft. All the demos are included in the zip file below:

Link to zip file: here

They are all pulled from the BitIO blogs which you can access here. To make it easier to plug and play with the demo's I have put 10 of them all in the above zip file. They can be accessed in the 'src' folder. If you read through the getting started with BitIO blog then you will have all the key information you will need to get started.

I hope you find this useful, I intend to use it at enrichment sessions in the new academic year and hopefully future Raspberry Jams.

Cya

Chris

Tuesday, 23 April 2019

Microbit Express V1.5(Remote controlled) in EduBlocks 2019


This is a recode of the original Micro:bit Express in EduBlocks. Here is the link to the original blog for context......link 

This is a follow on from this blog . This iteration builds upon the basic Micro:bit Express which goes forward and stops with a simple press of "a" and "b" button presses. This version adds the ability to remote control the Lego Train using a second Micro:bit.

Here is a picture of the Lego train......


here is the code for the motor controller..


Here is the XML file...... link
Here is the hex file......link

Here is the remote code......


Here is the XML file ..... link
Here is the hex file.......link

Cya 


Microbit Express V1 in EduBlocks 2019


This is a recode of the original Micro:bit Express in EduBlocks. Here is the link to the original blog for context......link 


Here is Micro:bit Express set up.......and in action
Here is what the code looks like.....


Here is the link to the code editor...... link

Here is the code as a hex file.....link
Here is the code as an XML file that you can load straight into EduBlocks Micro:bit editor......link

Enjoy cya

EduBlocks 2019


Here I will be linking to projects created / recreated using the new version of EduBlocks over the coming months.

Here you can see all my previous EduBlocks blogs / experiments.... link

This will be then new landing page / source of links for my future experiments.


Blog 1 Microbit Express V1 link

Blog 2 Microbit Express V1.5 Remote controlled link


References / credit
Credit for the screen grabs of Edublocks icons are taken from the Edublocks website were created by Josh Lowe. 


Cya

Saturday, 6 April 2019

Coventry and Warwickshire Jam '21 Stop frame Lego animations.


Here is the excellent creations by some of the attendees at today's mini jam at Coventry Central Library, using Martin O'Hanlon's GuiZero software.


Sunday, 17 March 2019

Microbit Controlled Rollercoaster


Always keen to see what else I can motorise with Lego I bought the necessary bits to motorise a Lego roller coaster. I bought only the carts, track and chain links from brick link. link

I borrowed the Ferris Wheel car parts from my daughters Ferris wheel that I had previously "borrowed" to motorise. (See below)

I used some basic cogs and Lego Technic bits to drive the cars up the main ramp(see below). 


I reused the Micro:bit motor controller and Micro:bit I had used previously on the Micro:bit Express and Ferris Wheel blogs(See below).


I used the following code:
from microbit import *

def stop():
    pin8.write_analog(1023)
    pin12.write_analog(1023)

def forward(speed):
    pin8.write_analog(speed)
    pin12.write_digital(0)
    display.scroll(speed)

    
speed = 400 

while True:
    
    if button_a.was_pressed():
        display.scroll('F')
        forward(speed)
    
    if button_b.was_pressed():
        display.scroll('S')
        stop()

Updated code for incremental speed control:

from microbit import *

def stop():
    pin8.write_analog(1023)
    pin12.write_analog(1023)

def forward(speed):
    pin8.write_analog(speed)
    pin12.write_digital(0)
    display.scroll(speed)

    
speed = 400 

while True:
    
    if button_a.was_pressed():
        
        
        speed = speed + 50
        msg = "F" + str(speed)
        display.scroll(msg)
        if speed > 1000:
            speed = 400
        forward(speed)
    
    if button_b.was_pressed():
        display.scroll('S')
        stop()


Over :)


Thursday, 21 February 2019

Gui Zero Lego animations


Lego stop frame animation using GuiZero and Pi Camera

(Now with added Twitter)


First of all this GuiZero app was made by Martin O'Hanlon last June you can read about it here. He has enabled you to take still images using a Pi camera and stitch them together to create an animated gif. Updated... 10/03/2019 now with added Twitter functionality. Explained at the bottom of the blog.

Here is what I did with it.......

1. I dug out my Pi Touch screen and bolted a Pi on the back. Then attached a Pi camera onto the pi.  

2. Cut out a hole in the box for the Pi touchscreen to locate the screen and taped it in place. I then cut a hole in the side of the box to push the key board and mouse and other cables through(See below). 


3. Then read Martin's instructions from his linked blog above about how to install the code and necessary libraries. 

4. Bodged together some Lego from my kids and set about testing it out. That is it. 

Here is my 2nd attempt......

Twitter update.....

After attempt 2 I decided to see if I could connect these gif animations to Twitter. Handily about 2 years ago I created a few Twitter bots following the RPI tutorial's. These days they are harder to get through the system. However here is the code that I used link  again I must stress the point that the original code was written by Martin O'Hanlon(the following blog explains his project  here).

Here is an example tweeted gif.....


enjoy :)

Monday, 18 February 2019

Raspberry Pi Zero Express


Pi Zero Express aka Raspi Express 2.5(now with added bluedot control)

Over the last 6 months I've iterated between Pi and Micro:bit versions of the microboard controlled Lego train. Micro:bit version will always be visible given the size of the motor controller. Whereas with the Edu Kit 3 motor board with a Raspberry Pi Zero W you have the potential for hiding the brains in the actual train somewhere. In every single version up until last week the micro controller was visible. That changed last week end. Up until recently I have tried to bolt a full sized Pi onto the train motor, in the summer ModMyPi kindly gave me a Pi zero W with GPIO actually attached (you can buy here ).
I received it in August, it took until February to actually dig in and get into miniaturisation. So here is my account of how to get  a Lego Train to move without it looking like a horrific mess.

Over the last year we have accumulated three cheap find's on eBay. My main aim was to make it remote control so if my son / daughter felt like it they could do it with out loads of fussing about. To this point that hasn't been achievable given everything hanging out / everything being very brittle.

The other major problem that I have had to contend with is that I've tried to attach the motor and everything else to the train, which in hindsight was daft. Because if the kids wanted to swap out the train that would mean pulling out the cables and faff. So I decided to bury everything into the train carriage.  If the kids want to use the HP express or either of the other two available then they can simply attach the train they want and the carriage hides all the gubbins, there are no exposed cables to worry about.

Below you can see them all....


The set up


The height of the train carriage had to be raised to fit everything in.

Also I have added a few of the flat plates to minimise how secure the roof is so it is easier to remove and less likely to fall apart each time. (at the bottom is the Pi Zero W which has wireless built in, there is also a battery holder for 4 x AA batteries, which powers the motor.)


On top of that is a cheap phone power bank which powers the Pi Zero W. Then the roof fits on top.
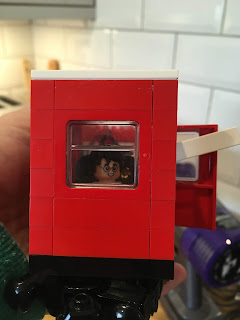
I even managed to nick one character at the back.

I use white plastic strip to keep the battery from making contact with the battery box when the train is not being used, it stops the batteries from draining, plus I don't have to physically pull out the batteries. 

The first two or three iterations required bolting down the pi(3b+), battery to power the pi and the 4 x AA batteries to power the motor. As you can see from the previous blog it was some what clunky(link). The key to getting this to work as a remote controlled train has been GUIZero and RealVNC. GuiZero for the interface and RealVNC for the ability to connect to the Pi remotely from my Iphone(insert your own phone / tablet). You can read the respective links for how to set up RealVNC, GUIzero comes pre-installed with Raspian OS. 

The code

The code for this hasn't really changed a great deal since version 1.0, I have added a slider to adjust the speed. Currenly this version isn't on github, but I will be refining it soon and I will come back and update the link then. Link

Real VNC

Is free and makes it really easy to enable remotely logging into your pi. You can find out more here link.

The future iterations...


  • Running multiple trains
  • Using light sensor to stop at the station
  • Lights????
  • Improved GUI

Bluedot Control update.....

I have recently dug out the Pi Touch screen and wanted to use this to be able to control the Pi Express. The best idea I could think of was using Bluedot by Martin O'Hanlon link .

1. I followed these instructions to install the app for my Pi touch screen and the necessary libraries for the Pi Express Pi Zero W.

2. Then I wrote the following code on the Pi Zero W which controls the train link.

3. Run the python code on the Pi controlling the train

4. On the second Pi which will be used as the remote controller run the bluedot app. 

5. Then you should be able to swipe on the blue dot t control the train. 

swipe up to increase forward speed


swipe down to increase forward speed


swipe left or right to stop the engine


n.b. when the speed hits 1 it stops the motor and resets speed to 0.


Over