Sunday, 17 March 2019

Microbit Controlled Rollercoaster


Always keen to see what else I can motorise with Lego I bought the necessary bits to motorise a Lego roller coaster. I bought only the carts, track and chain links from brick link. link

I borrowed the Ferris Wheel car parts from my daughters Ferris wheel that I had previously "borrowed" to motorise. (See below)

I used some basic cogs and Lego Technic bits to drive the cars up the main ramp(see below). 


I reused the Micro:bit motor controller and Micro:bit I had used previously on the Micro:bit Express and Ferris Wheel blogs(See below).


I used the following code:
from microbit import *

def stop():
    pin8.write_analog(1023)
    pin12.write_analog(1023)

def forward(speed):
    pin8.write_analog(speed)
    pin12.write_digital(0)
    display.scroll(speed)

    
speed = 400 

while True:
    
    if button_a.was_pressed():
        display.scroll('F')
        forward(speed)
    
    if button_b.was_pressed():
        display.scroll('S')
        stop()

Updated code for incremental speed control:

from microbit import *

def stop():
    pin8.write_analog(1023)
    pin12.write_analog(1023)

def forward(speed):
    pin8.write_analog(speed)
    pin12.write_digital(0)
    display.scroll(speed)

    
speed = 400 

while True:
    
    if button_a.was_pressed():
        
        
        speed = speed + 50
        msg = "F" + str(speed)
        display.scroll(msg)
        if speed > 1000:
            speed = 400
        forward(speed)
    
    if button_b.was_pressed():
        display.scroll('S')
        stop()


Over :)


Thursday, 21 February 2019

Gui Zero Lego animations


Lego stop frame animation using GuiZero and Pi Camera

(Now with added Twitter)


First of all this GuiZero app was made by Martin O'Hanlon last June you can read about it here. He has enabled you to take still images using a Pi camera and stitch them together to create an animated gif. Updated... 10/03/2019 now with added Twitter functionality. Explained at the bottom of the blog.

Here is what I did with it.......

1. I dug out my Pi Touch screen and bolted a Pi on the back. Then attached a Pi camera onto the pi.  

2. Cut out a hole in the box for the Pi touchscreen to locate the screen and taped it in place. I then cut a hole in the side of the box to push the key board and mouse and other cables through(See below). 


3. Then read Martin's instructions from his linked blog above about how to install the code and necessary libraries. 

4. Bodged together some Lego from my kids and set about testing it out. That is it. 

Here is my 2nd attempt......

Twitter update.....

After attempt 2 I decided to see if I could connect these gif animations to Twitter. Handily about 2 years ago I created a few Twitter bots following the RPI tutorial's. These days they are harder to get through the system. However here is the code that I used link  again I must stress the point that the original code was written by Martin O'Hanlon(the following blog explains his project  here).

Here is an example tweeted gif.....


enjoy :)

Monday, 18 February 2019

Raspberry Pi Zero Express


Pi Zero Express aka Raspi Express 2.5(now with added bluedot control)

Over the last 6 months I've iterated between Pi and Micro:bit versions of the microboard controlled Lego train. Micro:bit version will always be visible given the size of the motor controller. Whereas with the Edu Kit 3 motor board with a Raspberry Pi Zero W you have the potential for hiding the brains in the actual train somewhere. In every single version up until last week the micro controller was visible. That changed last week end. Up until recently I have tried to bolt a full sized Pi onto the train motor, in the summer ModMyPi kindly gave me a Pi zero W with GPIO actually attached (you can buy here ).
I received it in August, it took until February to actually dig in and get into miniaturisation. So here is my account of how to get  a Lego Train to move without it looking like a horrific mess.

Over the last year we have accumulated three cheap find's on eBay. My main aim was to make it remote control so if my son / daughter felt like it they could do it with out loads of fussing about. To this point that hasn't been achievable given everything hanging out / everything being very brittle.

The other major problem that I have had to contend with is that I've tried to attach the motor and everything else to the train, which in hindsight was daft. Because if the kids wanted to swap out the train that would mean pulling out the cables and faff. So I decided to bury everything into the train carriage.  If the kids want to use the HP express or either of the other two available then they can simply attach the train they want and the carriage hides all the gubbins, there are no exposed cables to worry about.

Below you can see them all....


The set up


The height of the train carriage had to be raised to fit everything in.

Also I have added a few of the flat plates to minimise how secure the roof is so it is easier to remove and less likely to fall apart each time. (at the bottom is the Pi Zero W which has wireless built in, there is also a battery holder for 4 x AA batteries, which powers the motor.)


On top of that is a cheap phone power bank which powers the Pi Zero W. Then the roof fits on top.
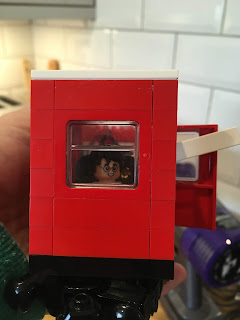
I even managed to nick one character at the back.

I use white plastic strip to keep the battery from making contact with the battery box when the train is not being used, it stops the batteries from draining, plus I don't have to physically pull out the batteries. 

The first two or three iterations required bolting down the pi(3b+), battery to power the pi and the 4 x AA batteries to power the motor. As you can see from the previous blog it was some what clunky(link). The key to getting this to work as a remote controlled train has been GUIZero and RealVNC. GuiZero for the interface and RealVNC for the ability to connect to the Pi remotely from my Iphone(insert your own phone / tablet). You can read the respective links for how to set up RealVNC, GUIzero comes pre-installed with Raspian OS. 

The code

The code for this hasn't really changed a great deal since version 1.0, I have added a slider to adjust the speed. Currenly this version isn't on github, but I will be refining it soon and I will come back and update the link then. Link

Real VNC

Is free and makes it really easy to enable remotely logging into your pi. You can find out more here link.

The future iterations...


  • Running multiple trains
  • Using light sensor to stop at the station
  • Lights????
  • Improved GUI

Bluedot Control update.....

I have recently dug out the Pi Touch screen and wanted to use this to be able to control the Pi Express. The best idea I could think of was using Bluedot by Martin O'Hanlon link .

1. I followed these instructions to install the app for my Pi touch screen and the necessary libraries for the Pi Express Pi Zero W.

2. Then I wrote the following code on the Pi Zero W which controls the train link.

3. Run the python code on the Pi controlling the train

4. On the second Pi which will be used as the remote controller run the bluedot app. 

5. Then you should be able to swipe on the blue dot t control the train. 

swipe up to increase forward speed


swipe down to increase forward speed


swipe left or right to stop the engine


n.b. when the speed hits 1 it stops the motor and resets speed to 0.


Over

Saturday, 2 February 2019

Useful stuff


Here is a list of none blog related content that  have contributed to over the last few years that might be useful:

Hackpack Anthology Volumes 1-5 Link (Comprehensive set of coding with Minecraft resources produced at my old school and with contributions by others)

MapMaking Mag issue 5: 'Engaging students with programming with Minecraft' Link (Intro to coding wit python and Minecraft)

MapMaking Mag issue 8: 'Physical Computing with Minecraft' using Micro:bit Link (Micro:bit BitIO blogs in a printable format)

MicroMag Issue 1: Link (Micro:bit controllable Minecraft Pixel walls)

MicroMag Issue 2: Link Micro:bit controlled Lego Train tutorial.

MicroMag Issue 3: Link (Micro:bit controllable / scalable Minecraft cubes)

Friday, 28 December 2018

Raspberry Pi RC Lego car


In the next iteration of the Raspberry Pi based controlling of Lego motors I purchased another basic motor previously used with the Ferris Wheel, the aim was to create a simple RC Lego car. The remote control is the same idea as in the RaspiExpress using GuiZero and accessing that over wifi on my Iphone using Real VNC.

Here is a photo of the latest hacked together vehicle:

Here is the code:......Link

Here is a video of it working.... Link

Updated 08/01/19.

New updated GUI using GuiZero.

Here is the updated code: link

Here is what it now looks like:


Cya.

Saturday, 15 December 2018

3d printed light up Lego Christmas Tree


Kari Lawler has helped out at several jams over the last 18 months and has kindly made some 3d printed christmas trees that slot together and sit nicely on a Lego brick. Here is the relevant info if this something that interests you:

Here is the 3D stl file : link
Here is a video of it working: link
Here is the code : link

To control the light you will need:

  • 1 x neo pixel 
  • 1 x Micro:bit
  • 3 x crocodile clips
  • Power for the Micro:bit


Here are basic images of how it was put together:


Over

Wednesday, 12 December 2018

Blocks controlling blocks


This recycles the code from the RaspiExpress and replaces the GUI buttons with whacking different blocks in Minecraft. This still uses a Raspberry Pi and a Lego motor. The same Edu Kit 3 motor controller/ hat is used. Please see a video below of how the initial test worked.

Here is a link to the code: link


Cya